On-Device AI: My Journey from a Failed Model to Real-Time 3D Overlays in Flutter
I’ve been fascinated for a while by the idea of creating applications that can see and understand the world. My goal was to build a mobile app that didn’t just detect objects in real-time but could also bring them to life by overlaying interactive 3D models. Crucially, I wanted to do this entirely on the user’s device; no cloud APIs, no internet dependency, just pure on-the-edge performance. This post isn’t a story of overnight success; it’s the story of two attempts, a critical failure, and the valuable lessons learned on the path to building a truly magical AI experience.
Table of Contents
The Vision: True Real-Time, On-Device AI
Plan: Use Flutter to build a cross-platform app that taps into the live camera feed, identifies objects, and places a corresponding 3D model over each one. The “on-device” constraint was non-negotiable for three key reasons:
- Privacy: User data, especially from a camera, should never leave the device unnecessarily.
- Speed: Real-time interaction requires near-instantaneous inference, something cloud latency makes difficult.
- Accessibility: The app should work anywhere, regardless of internet connectivity.
After initial research, I decided to bypass pre-packaged solutions like ML Kit, which I found had some limitations on iOS for my specific use case. I wanted full control over the AI pipeline, from model selection to rendering. This led me down a path of building a custom solution from the ground up.
Attempt #1: The Generalist Model and the Hard Truth
Excited to get started, I dove into the world of open-source computer vision models. My first choice was a powerful, general-purpose YOLO model. On paper, it was a beast, capable of not just object detection but also workout monitoring, distance measurements, and more.
My plan was to convert this model to a format that Flutter could use. The workflow looked like this:
- Acquire Model: Find a pre-trained YOLO model.
- Convert: Use conversion tools to transform it first to the ONNX format, and then finally to TensorFlow Lite (
.tflite). - Integrate: Load the
.tflitemodel into my Flutter app using thetflite_flutterpackage.
I managed to get it all working, but the result was a complete failure in terms of user experience.
The Problems:
- Painfully Slow: The detection was laggy and could not keep up with the real-time camera feed.
- Inaccurate & Unreliable: The model struggled to identify objects with any reasonable confidence. Bounding boxes would flicker or identify objects incorrectly.
- Massive App Size: The base model was huge, designed for powerful server hardware, not the tight constraints of a mobile phone. My app’s size was unacceptable.
💡 The Diagnosis: I had fallen into a classic trap. I chose a “jack-of-all-trades” model that was master of none on mobile. It was not optimized for the specific task of real-time, on-device object detection, and its size and complexity were its downfall.
Attempt #2: The Pivot to a Mobile-First Mindset
It was time to go back to the drawing board. Instead of looking for the most powerful model, I started searching for the most efficient one. My research led me to the SSD MobileNet v1 architecture. This model was different; it was designed from the ground up for mobile devices.
The difference was night and day.
| Feature | Attempt #1 (General YOLO) | Attempt #2 (SSD MobileNet v1) |
|---|---|---|
| Architecture | General-Purpose, complex | Mobile-Optimized, lightweight |
| Performance | ❌ Slow, high latency | ✅ Fast, real-time inference |
| Accuracy | ❌ Low confidence, unreliable | ✅ High confidence, stable |
| Model Size | ❌ Huge (bloated app) | ✅ Small and efficient |
| Use Case Fit | ❌ Poor | ✅ Perfect |
I created a new, clean project, laser-focused on doing one thing perfectly: object detection. Integrating the SSD MobileNet model was a breeze. The detections were fast, accurate, and the confidence levels were consistently high. This was the breakthrough I needed.
// Example: Loading the optimized TFLite model in Flutter
import 'package:tflite_flutter/tflite_flutter.dart';

class TFLiteService {
  late Interpreter _interpreter;

  Future<void> loadModel() async {
    try {
      _interpreter = await Interpreter.fromAsset('ssd_mobilenet.tflite');
      print('Model loaded successfully.');
    } catch (e) {
      print('Failed to load model: $e');
    }
  }

  // ... inference logic follows
}
This successful pivot proved a critical lesson: in mobile development, especially with AI, the architecture you choose is everything.
Bringing it to Life: Integrating 3D Models
With a reliable detection system in place, I could finally tackle the most exciting part: the 3D overlays. For this, I used the flutter_3d_controller package, which allows you to render .glb 3D model files directly within a Flutter widget.
The logic was straightforward:
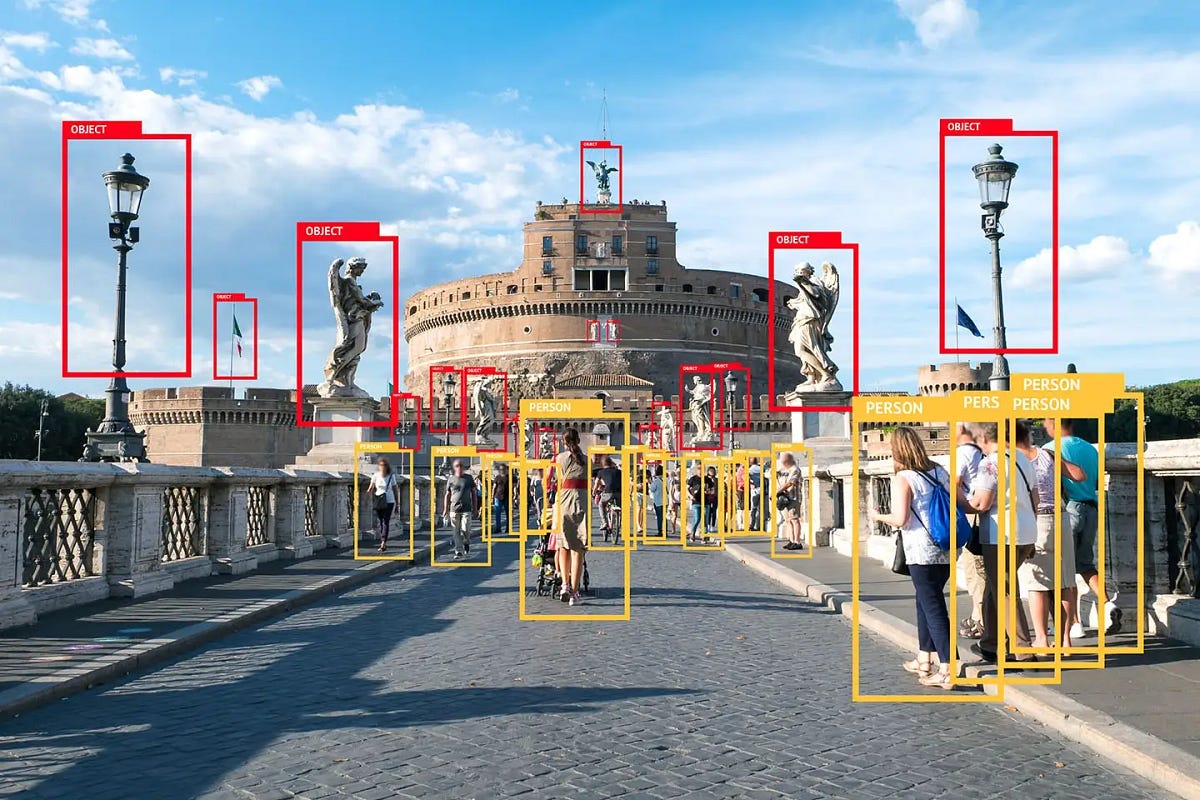
- Run Detection: The SSD MobileNet model processes the camera frame and returns a list of detected objects with their labels and bounding boxes.
- Map Object to Model: I created a simple map to associate an object label (e.g., “chair”, “cup”) with a local 3D model asset (
chair.glb,cup.glb). - Render and Position: For each detected object, I would load the corresponding 3D model and render it on the screen, positioning it over the calculated bounding box.
💡 Pro Tip on Performance: Rendering multiple complex 3D models can be resource-intensive. To keep the UI smooth (60fps), I implemented a performance management system: the app limits concurrent 3D models to a maximum of 5 and uses an LRU cache to manage memory. If performance dips, it automatically falls back to drawing simple 2D bounding boxes.
Final Architecture and Key Learnings
The final project is built on a clean architecture, separating services, widgets, and data models. This makes the code maintainable and scalable. For state management, I used MobX, which pairs nicely with Flutter for managing the reactive flow of data from the camera to the UI.
This journey taught me three crucial lessons:
- Mobile-First is a Necessity: On-device AI is not about shrinking a large model; it’s about using architectures designed specifically for mobile constraints.
- Failure is a Great Teacher: My first failed attempt gave me more clarity and insight than an easy success ever could have. Don’t be afraid to scrap something that isn’t working and start fresh with a better approach.
- The Right Tools Compound Your Efforts: The combination of Flutter for the UI, a mobile-optimized model like SSD MobileNet for the AI, and targeted packages like
flutter_3d_controllercreates a development experience that feels like having superpowers.
Conclusion
From a laggy, unreliable prototype to a fluid, real-time AI vision app, this project was a rollercoaster of learning. It solidified my belief in the power of on-device machine learning and the incredible potential of combining it with interactive, cross-platform frontends like Flutter. The final result is an app that truly feels like it’s from the future, and it’s a testament to the power of perseverance and choosing the right tool for the job.
Have you experimented with on-device AI? I’d love to hear about the models and frameworks you’ve used. Feel free to check out the source code on GitHub or reach out to me directly!
Found this post insightful? Please consider sharing it with others who are passionate about the future of mobile AI.